Steps
- Application for connection
All information required for connection — in one application - Access to the test environment
Get access to the test environment and integrate under the supervision of S7 technicians - Hello world!
Set your software and make your first request! - Running your tests
Test the S7 Agent API to prevent future problems - Signing of the contract of EDS
Sign the contract electronically - Access to production environment
Get access to the production environment and complete integration - Maintenance
Use the all of capabilities of the S7 Agent API and stay tuned for a new features!
Roles
| Role | Description | Target period |
|---|---|---|
| Integrator | a developer, who creates a solution for agents and proceed integration with the S7 Agent API | 7 working days |
| Agent with own solution | an agent, who creates own solution for yourself and proceed integration with the S7 Agent API | 7 working days |
| Agent with Integrator's solution | an agent, who going to use solution to connect to S7 environment, provided by integrator | 3 working days |
| Anchor | ||||
|---|---|---|---|---|
|
Environment
| Excerpt Include | ||||||
|---|---|---|---|---|---|---|
|
| Anchor | ||||
|---|---|---|---|---|
|
Integrator
Agent with own solution
Agent with Integrator's solution
1. Contact to manager of your region and request for an application form (sample) at vm@s7.ru or https://api4agent.s7.ru/
2. Fill in the application form with a link to your portal and send it to S7 manager.
In the contact data of a technical specialist must be specified:
- Technical specialist
- Integrator representative
- Agent representative
- Technical specialist
- Agent representative
- Agent representative
- Integrator representative
3. S7 checks your form and initiates registration in our systems, including JIRA for communication with our technical support
4. Receive JIRA account credentials from S7 by email to technical specialist or agent representative
5. Proceed by the link provided in email to set password and log in to JIRA
6. Go to Projects and find Agent API Support (AAS)
| Anchor | ||||
|---|---|---|---|---|
|
Integrator
Agent with own solution
Agent with Integrator's solution
1. Check your environment for OpenSSL and install additional software (required to create a request for SSL certificate):
| Panel | ||
|---|---|---|
| ||
Download the last binary version of OpenSSL at https://www.openssl.org/community/binaries.html and install software |
| Code Block | ||
|---|---|---|
| ||
sudo apt install openssl |
| Panel | ||
|---|---|---|
| ||
No action is required — already included in OS |
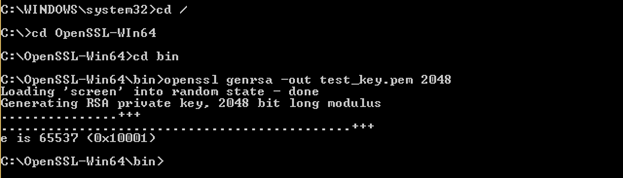
2. Use command line (as administrator) to create private key:
| Panel | ||
|---|---|---|
You have to replace ${clientkey} into understandable name using your local naming policies
|
3. Create request for SSL certificate:
| Panel | ||
|---|---|---|
Replace ${clientcsr} to the name used on previous step You have to replace ${clientkey} and ${clientcsr} into understandable name using your local naming policies
|
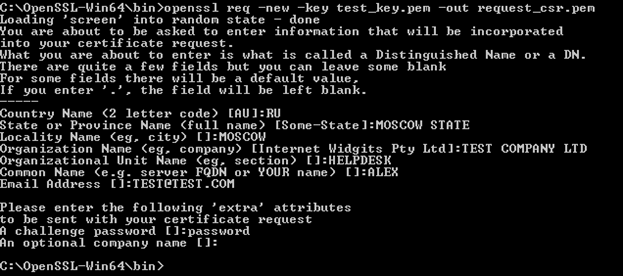
4. Fill in the details of the request for SSL certificate:
| Panel |
|---|
Mandatory:
No need to specify:
|
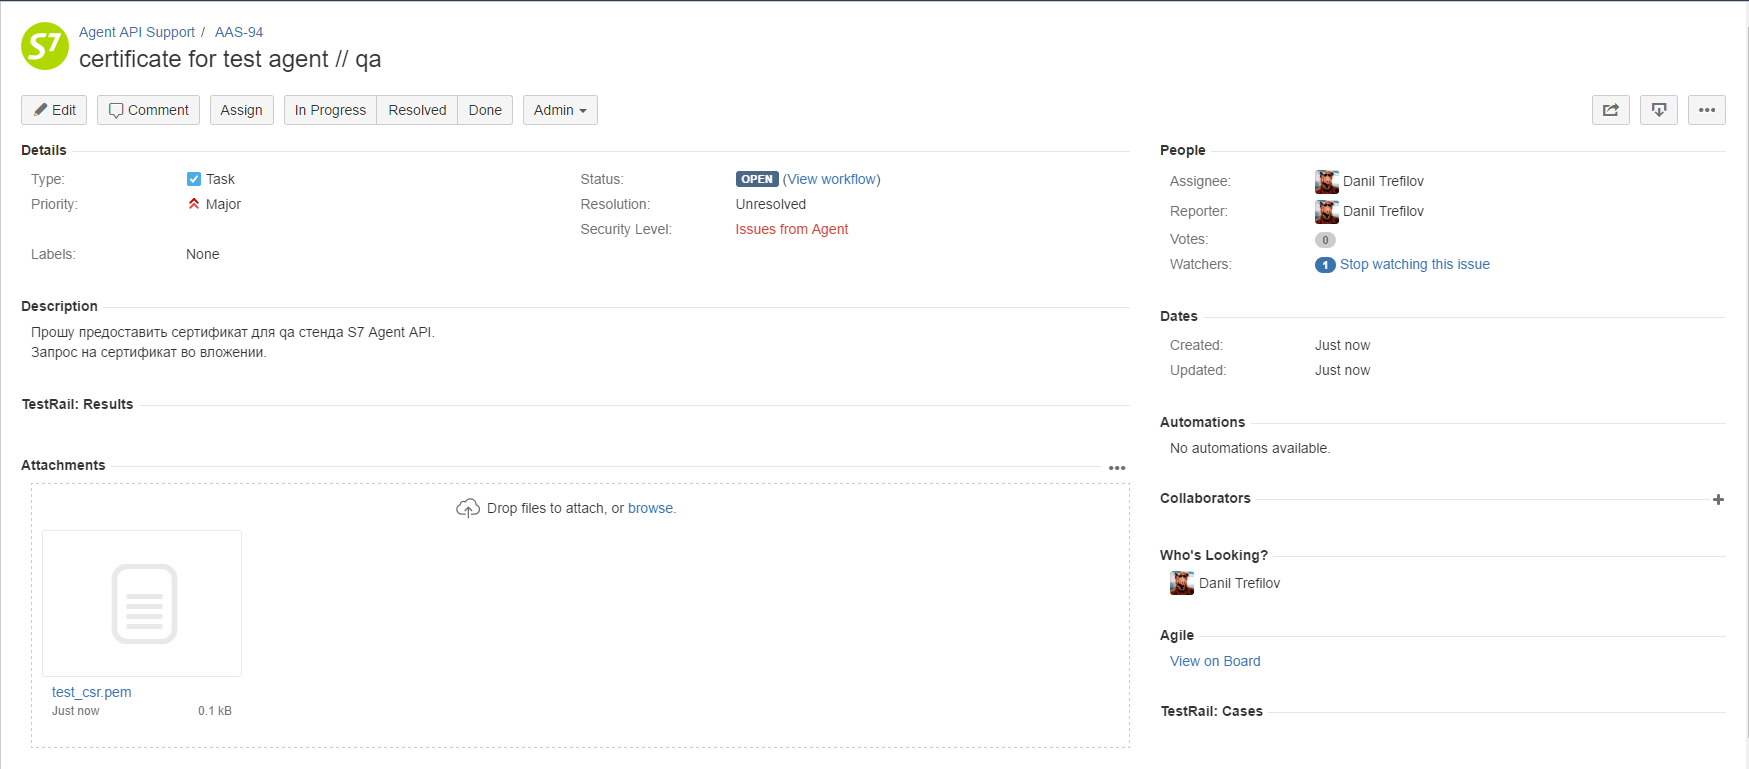
5. Create a new task with the request of SSL certificate (request_csr) by JIRA
| Panel |
|---|
Attach to the task created request for SSL certificate (request_csr) |
6. Receive credentials for test environment from our technical support:
| Panel |
|---|
|
7. Import SSL certificate and create key store file:
| Panel | ||
|---|---|---|
Export Password – password for key store file which will be requested while importing into test software
|

Responsibility of Integrator
Agent do not issue a certificate for the test environment
| Anchor | ||||
|---|---|---|---|---|
|
Integrator
Agent with own solution
Agent with Integrator's solution
1. If you are using test software build in browser you have to import keys (or check your software's documentation):
| Panel | ||
|---|---|---|
| ||
Menu → Preferences → Advanced → ViewCertificates → Your Certificates → Import → Choose created key store file (*.p12) on previous step |
| Panel | ||
|---|---|---|
| ||
Settings → Advanced Settings → HTTPS/SSL → Import → Choose created key store file (*.p12) on previous step |
2. For a better experience, we prefer to use SoapUI for testing:
| Panel |
|---|
Download the last binary version of SoapUI at https://www.soapui.org/downloads/soapui.html and install software |
3. Open SoapUI and create a new SOAP project
| Panel |
|---|
|
4. Assign created key store file to the project
| Panel |
|---|
|
5. Create new request and set basic authentication
| Panel |
|---|
|
6. Set assigned keystore
| Panel |
|---|
|
7. Set the endpoint of test environment at the top of request window
8. Fill in the request textarea by an example described below and send it!
Excerpt Include OW + 1xADT + Transit + CodeShare | v0.35 | searchFlights operation OW + 1xADT + Transit + CodeShare | v0.35 | searchFlights operation nopanel true
9. If you have no results, try to check your connection to exclude the case of incorrect credentials before you contact to our technical support by JIRA.
| Panel |
|---|
|
Responsibility of Integrator
All tests executes by a personal certificate of integrator
| Anchor | ||||
|---|---|---|---|---|
|
Integrator
Agent with own solution
Agent with Integrator's solution
1. Choose one of available versions at test environment at the top of the page
2. Use header's parameters for selected version (If the parameter is not defined, the oldest version will be used by default):
3. Read the API's documentation
4. Try to execute the user story with the simplest flow and then other scenarios that you are interested in
| Panel |
|---|
|
5. Give us a feedback through your manager or our technical support by JIRA
6. Ready to production environment?
6.1. Check available test scenarios and choose which you're going to use at production environment
6.2. Notify our technical support by JIRA for final testing under the supervision of our technologists
| Panel | ||
|---|---|---|
| ||
|
6.3. Proceed test scenarios and attach all created PNRs and ETK numbers as a comment at the issue
6.4. Assign the issue to the "tech_s7" and keep
![]() Keep all conversation with our technical support and technologists only in comments at the issue
Keep all conversation with our technical support and technologists only in comments at the issue![]() If you faced any problems, create a new issue in JIRA and link with the issue for final testing
If you faced any problems, create a new issue in JIRA and link with the issue for final testing
6.5. Once all tests will be passed you can proceed to signing of the contract of EDS
Responsibility of Integrator
Because Agent is going to use an Integrator's solution, we immediately proceed to signing of the contract of EDS and skip final testing under the supervision of our technologists to grant access to production environment
| Anchor | ||||
|---|---|---|---|---|
|
Integrator
Agent with own solution
Agent with Integrator's solution
| Anchor | ||||
|---|---|---|---|---|
|
Integrator
Agent with own solution
Agent with Integrator's solution
| Anchor | ||||
|---|---|---|---|---|
|
Integrator
Agent with own solution
Agent with Integrator's solution
1. Choose one of available and tested versions at production environment at the top of the page
2. Use header's parameters for tested selected version (If the parameter is not defined, the default version will be executed):
3. Try to use read operations to check the correctness of your first bookings (read operation) and issued tickets (retrieveTicket operation)
| Note |
|---|
Avoid making mistakes in the production environment due to the penalties specified in the signed contract! |
4. Don't forget to check our updates!
| Panel |
|---|
|
Despite the fact that the integrator was developing solution, you are responsible for all mistakes at the production environment.
| Note |
|---|
Check the correctness of your first bookings and issued tickets to avoid making mistakes due to the penalties specified in the signed contract! |
| Info |
|---|
If you still have any questions, try to find an answer using our FAQ and documentation or ask for technical support by JIRA or email at api.support@s7.ru |